Black School Uniform Notes
SceneGraph Plus Version
My notes on using SceneGraph Plus instead of a spreadsheet and SimPe when converting my Public School Uniforms mod to use alternative black uniforms.
The first part of the original notes, analysing what black uniforms we have, is the same. But don't bother with reading the config notes, creating a spread sheet, or starting SimPe!
Getting Started
Grab the "required full body clothes and meshes" and unzip into your test folder under Downloads. We don't need the meshes for SceneGraph Plus, but you will need them for testing!
Download the WH_PublicSchoolUniform.package file into your test folder and rename it as "Xyz_PublicSchoolUniform_Black.package" where Xyz is something to identify you (I use my initials WH)
Start SceneGraph Plus
On the Mode menu, make sure both "Advanced" and "Auto-Backup" are checked.
Drag-and-drop your renamed WH_PublicSchoolUniform.package file onto SceneGraph Plus - there will be lots of missing resource blocks, don't worry about those. For information, missing CC blocks are light gray, while Maxis blocks are the darker gray.
Teen Males
From the "Options" menu, select "Filters..." to open the "Filters Dialog". Drag it somewhere out of the way.
In the "Filters Dialog", ctrl-click Male and ctrl-click Teens, then click Apply, then click Realign. Leave the dialog open.
We now have just the four AGED resources for Teen Males showing (which I have rearrange to fit my screen grabs, you don't need to do this.)
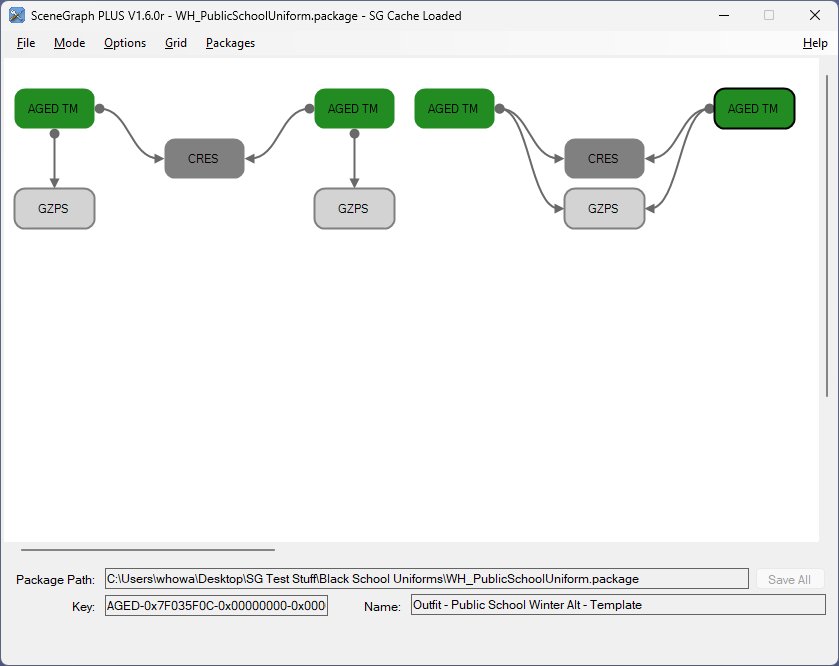
The two summer outfits (left) use the same CRES and the two winter outfits use the same CRES and GZPS, as we have three black TM outfits this arrangement may work for us.
Drag-and-drop the three TM outfits (keoni-SpringBreakTMuniformJacket.package, keoni-SpringBreakTMuniformJacketSneakers.package and keoni-SpringBreakTMuniformSpencer.package) onto SceneGraph Plus. (Again I have rearranged the chains to fit my screen grabs.)
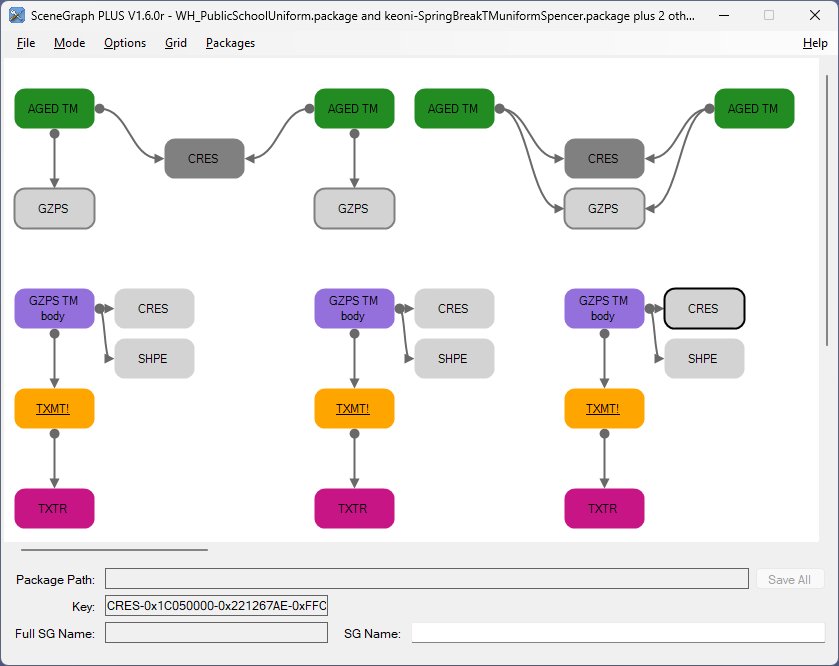
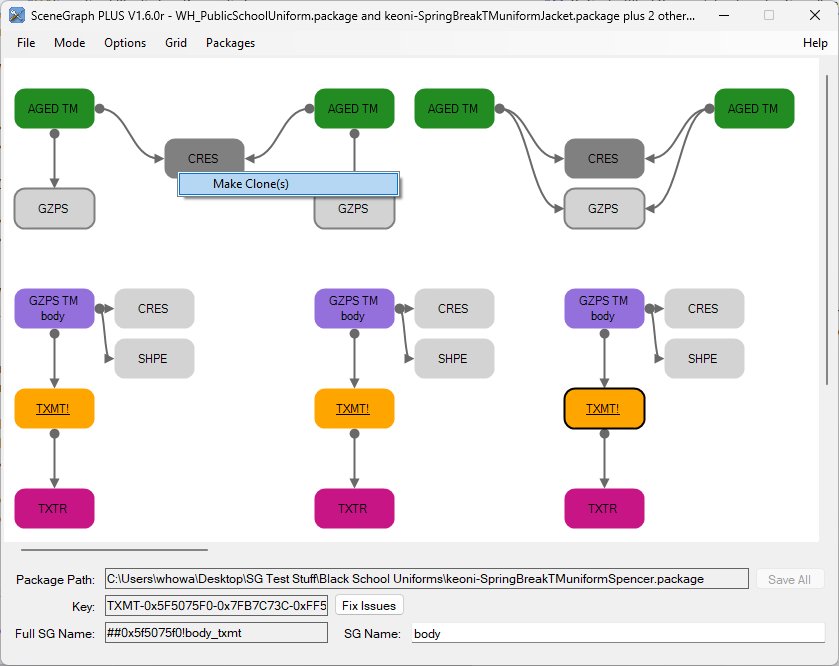
We need to split the shared CRES on the left, right-click on it and select "Make Clone(s)"
A clone is created, we know which one is the clone from its colour (not that it actually matters).
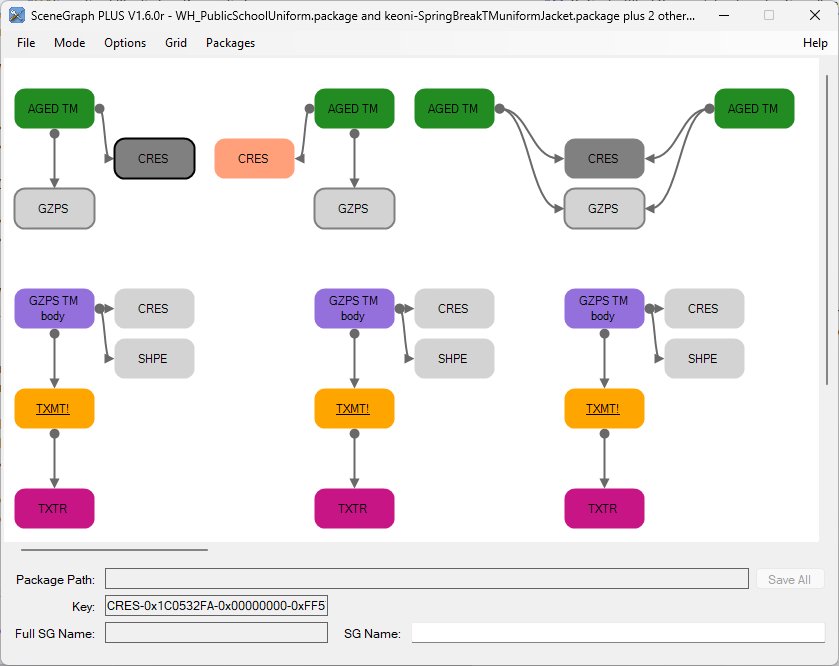
Holding down the shift key, drag-and-drop each of the "GZPS TM body" blocks onto the missing GZPS blocks
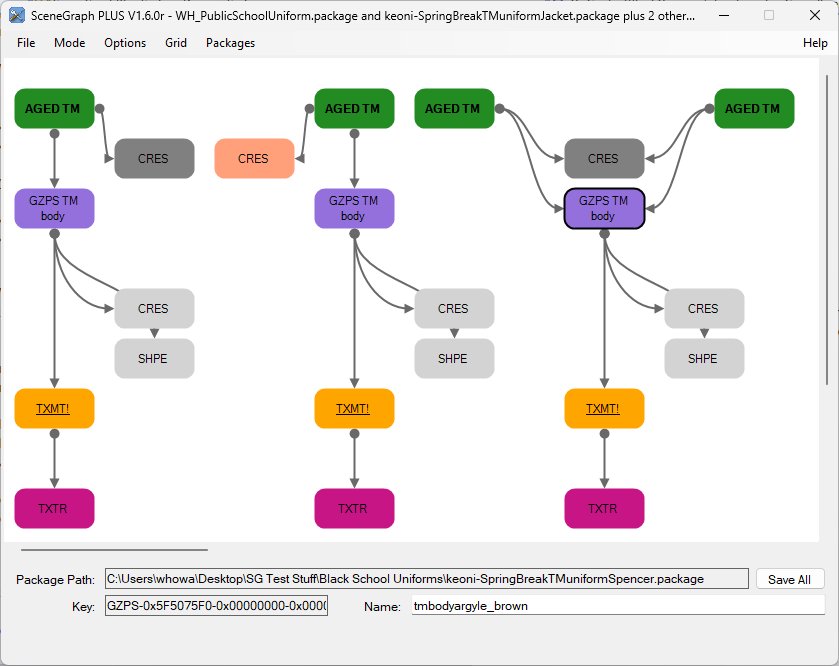
Holding down the shift key, drag-and-drop the CRES block associated with the "GZPS TM body" block onto the associated CRES block attached to the corresponding "AGED TM" block.
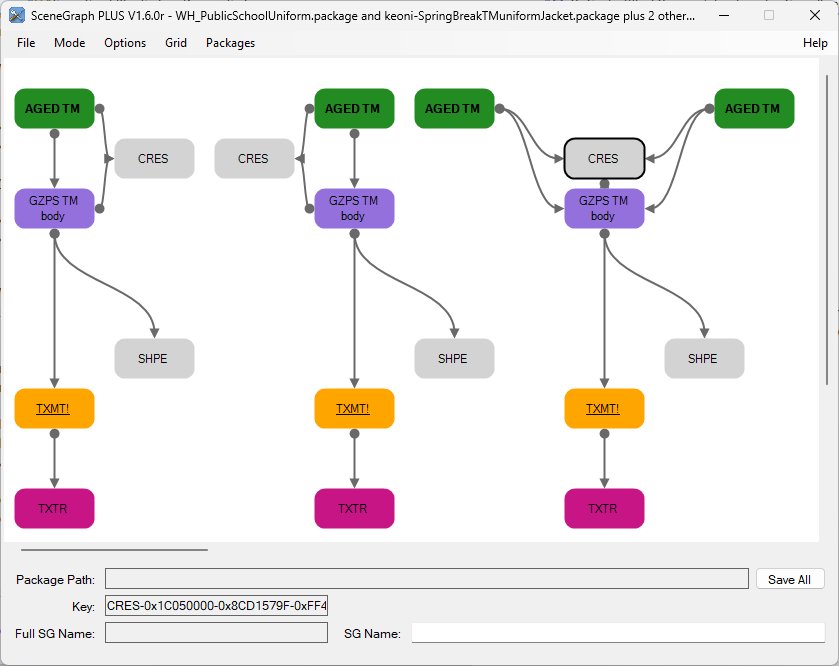
With TM complete, this is a good point to save, so click the Save All button. Also, we cannot add .package files with unsaved changes.
Teen Females
In the Filters dialog, ctrl-click Female, then click Apply, then click Realign - we have just the TF resources showing.
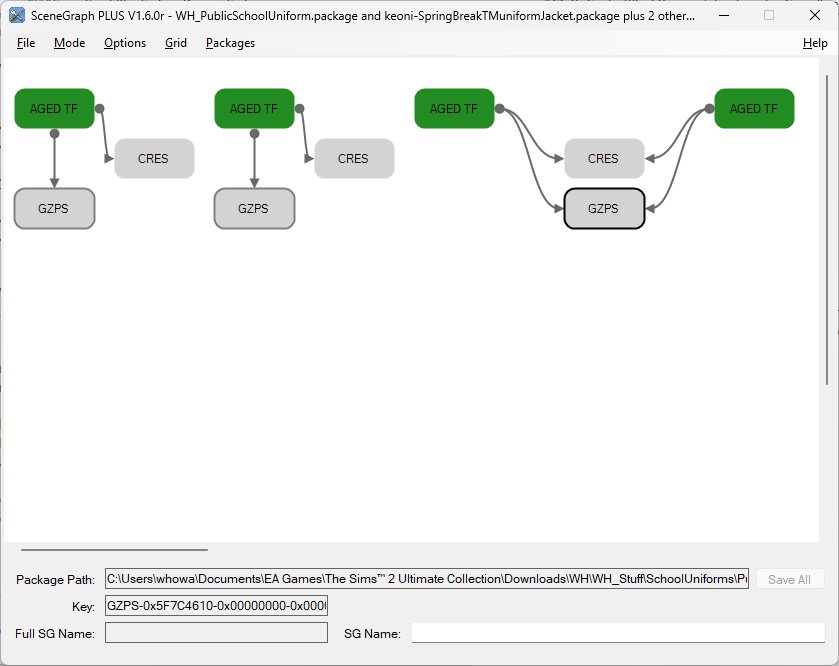
Drag-and-srop the four TF outfits onto SceneGraph Plus
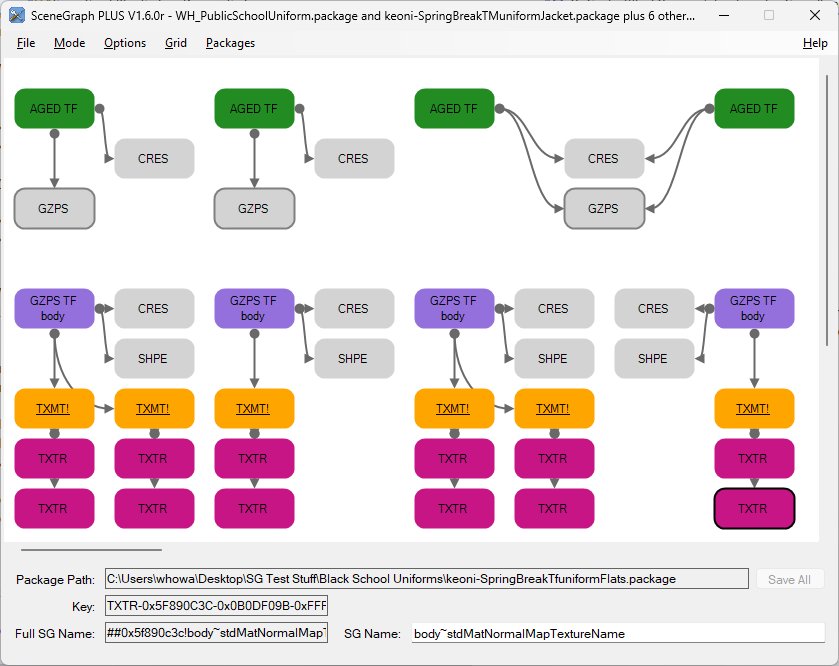
Split the shared CRES and GZPS
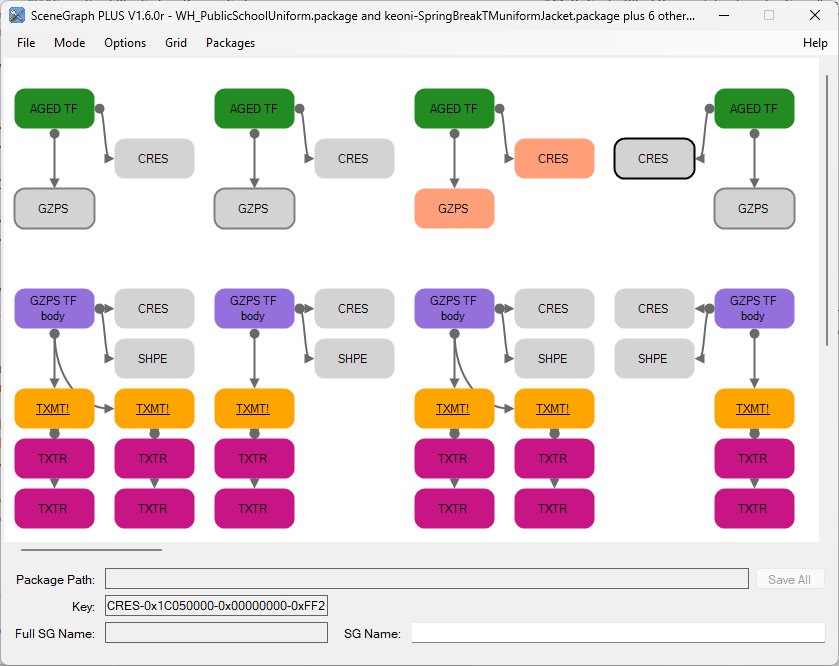
Holding down the shift-key, drag-and-drop the "GZPS TF body" blocks and their associated CRES block to link them up to the AGED TF blocks
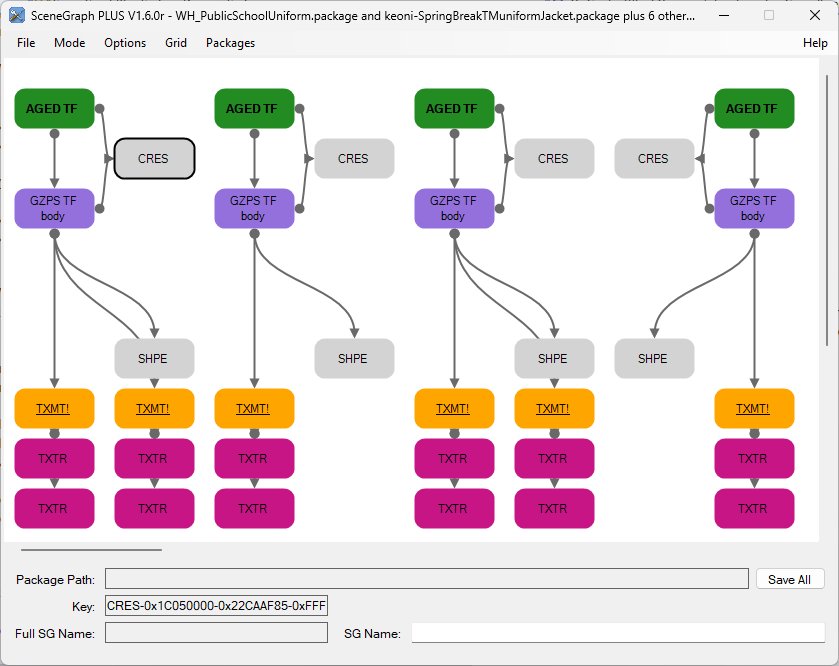
Save All
Child Females
In the Filters dialog, ctrl-click Children, then click Apply, then click Realign - we have just the CF resources showing.
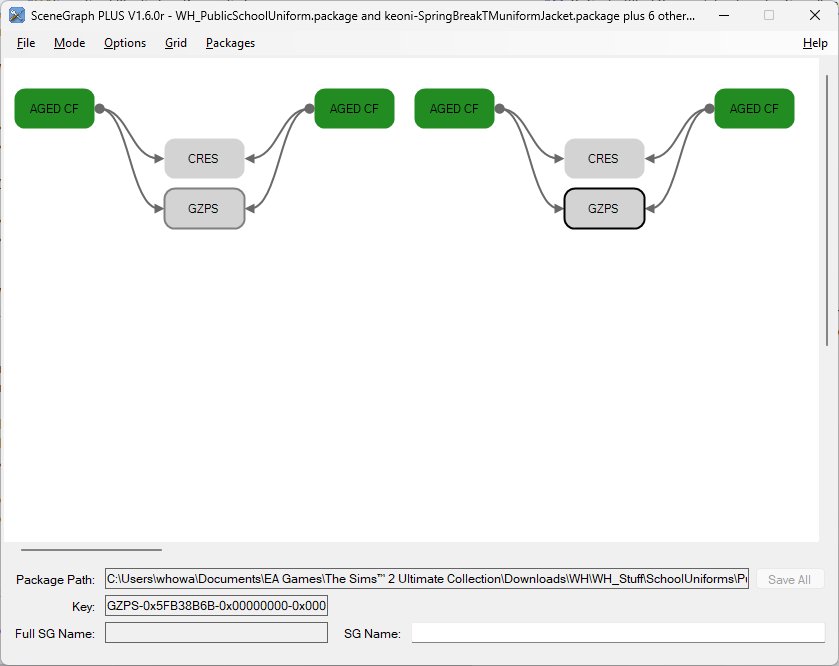
Drag-and-drop the "SkeletonTea-PrivateSchoolND-CF.package" onto SceneGraph Plus
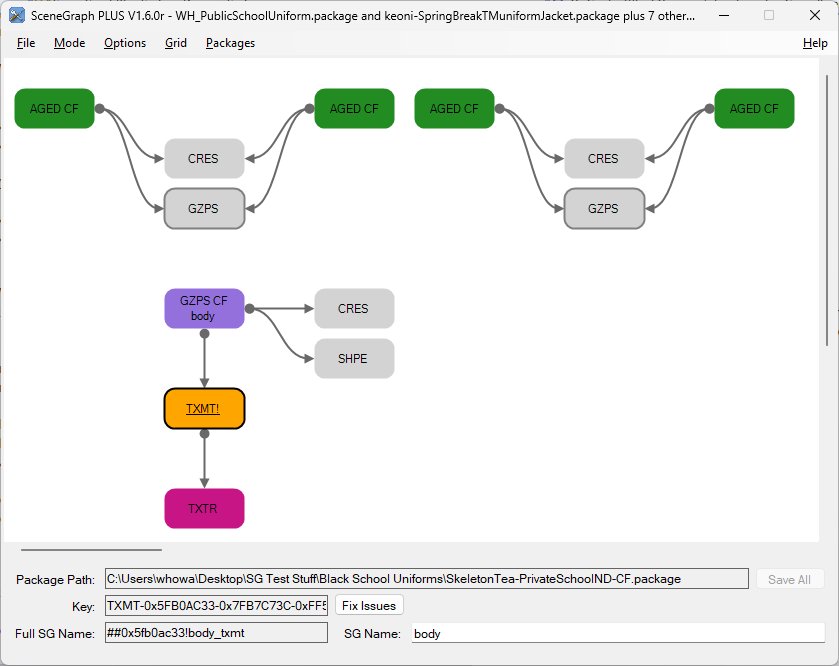
Holding down the shift-key, drag-and-drop the "GZPS CF body" block onto either of the missing GZPS blocks, and then with the shift-key still down, drag and drop it onto the other missing GZPS block
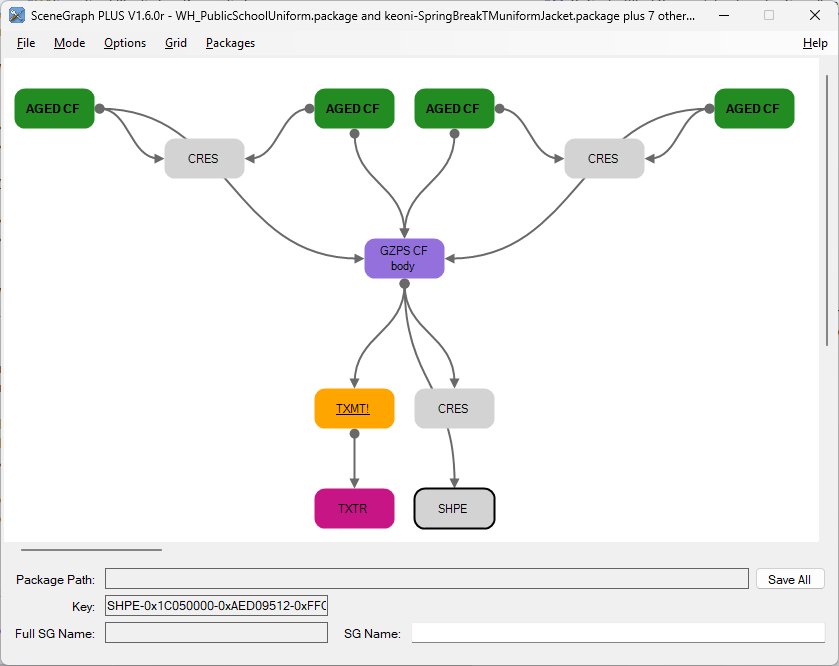
Repeat to link the CRES associated with the "GZPS CF body" block onto both of the missing CRES blocks associated with the AGED CF blocks
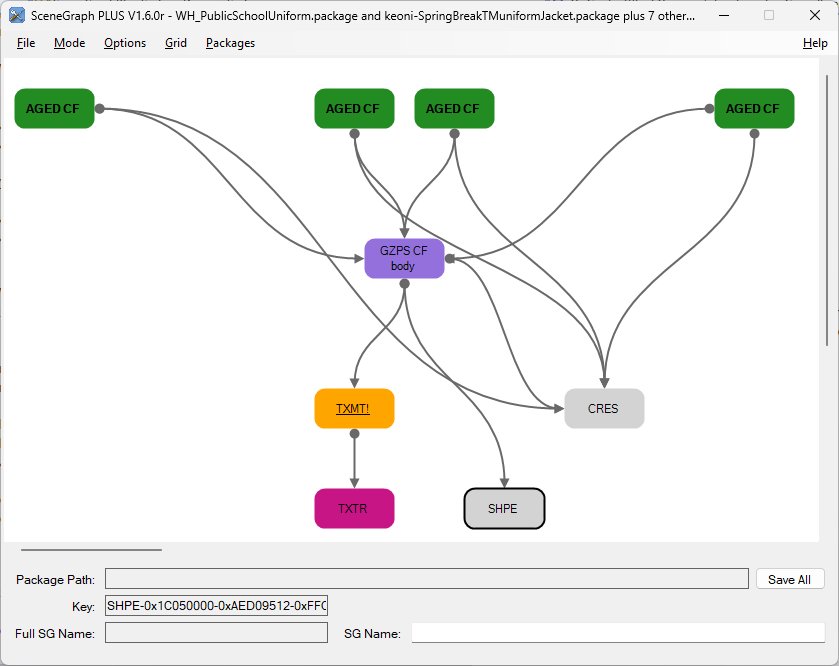
Save All
Child Males
In the Filters dialog, ctrl-click Male, then click Apply, then click Realign - we have just the CM resources showing.
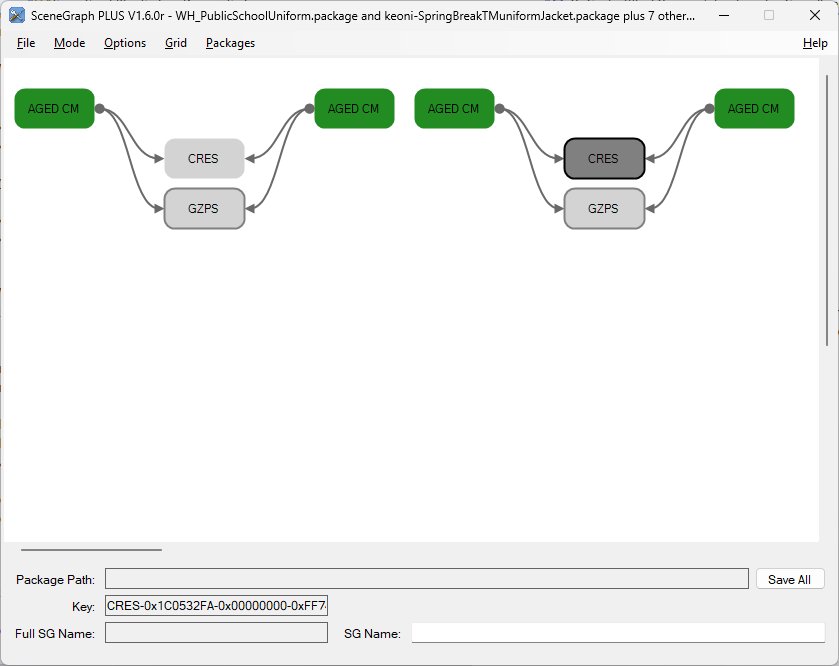
Drag-and-drop the "SkeletonTea-PrivateSchoolND-CM.package" onto SceneGraph Plus and link in the resources exactly the same as we did for CF
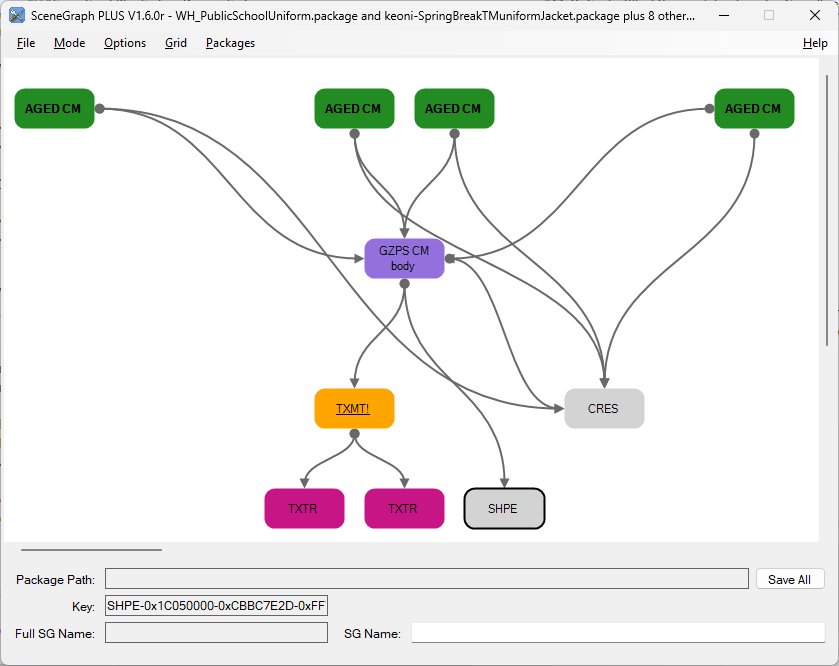
Save All
Test in game
Hopefully a lot easier that noting down all those hex numbers in a spread sheet and hand-editing them in SimPe!
You'll still need to make the code changes for randomness in the BHAV.
Hope these notes are of use to someone. Enjoy!
You are free to use my code in any way you want, a credit would be nice, but not required.
Specifically, you may
- reverse engineer the code to figure out how I did it
- modify the code to do something different but similar and redistribute it, provided you change the name of the .package file
- merge my code into your own mod and redistribute it
- merge my code into another mod for your own use. You may redistribute this mod-mod ONLY if the author(s) of the other mod permit it
Before contacting me to report any issues, errors or conflicts please ensure you have read and followed Help Me To Help You and Help Me To Help You - Part 2
